


Transcript
- Hi everyone.
Thank you for joining us.
Welcome to the Sono site
behind the scan webinar entitled Sono Site St.
Engineered to Enhance Procedural Efficiencies.
My name is Chris Pennell
and I'll be moderating today's webinar.
Before we begin, please be advised all attendees are muted
and you may type your questions into the q
and a box in the toolbar located at the bottom
or the side of your screen, and we'll get to those questions
during the q and a session at the end
of the presentation and demonstration.
This webinar will be recorded
and archived for future reference on our webinars
website@sonosite.com slash behind the scan webinar.
So to get started here with us today,
we have a couple of presenters.
First up is Jody Miller.
Jody is the director of anesthesia market development
for FU Fujifilm SonoSite.
And before joining SonoSite, Jodi spent over 15 years
as a clinical sonographer
and has been with SonoSite for the past 22 years.
Over those 22 years, Jody has been dedicated
to helping support clinicians use point of care ultrasound
to its fullest potential to help treat
and care for patients.
And assisting us with scanning today is Daniel Shelton.
Daniel is the director of musculoskeletal market development
for Fujifilm Sono site.
Daniel spent 18 years as a dedicated Ms K sonographer
and 12 of those years have been here at Sono site.
He now leads musculoskeletal market development
where he works to spread the word about the benefits
of point-of-care ultrasound.
And with that, I'll let Jody get
started with our presentation.
- Hi, I am Jody Miller
and welcome to the webinar on the Sono site st.
We are coming to you live from the cyte Virtual Studio in
Bothell, Washington.
And today we're gonna cover some of the features
and benefits of the new Sono site st.
And then we'll move on to some live scanning.
We'll scan the inner scaling nerves
and the median nerve at the level of carpal tunnel.
So let's get started. The Sono site ST
is designed to enhance procedural efficiencies
with an intuitive user interface and cyte image clarity.
In a 21 inch all touchscreen display,
the SonoSite ST helps clinicians achieve a high level
of confidence and success when performing procedures.
Using the feedback from our customers,
we made sure the Cyte ST has a streamlined design
to assist clinicians deliver care close to the bedside.
It also has a simplified workflow design
for procedural efficiency
and cyte image clarity to deliver clinician confidence.
Now let's talk about the streamlined design.
First, you'll notice a large 21 inch all
touchscreen display.
The monitor can tilt up to 60 degrees
to aid in transportation
and ease in the movement of the system.
Next, there are dual transducer holders that support ease
of preparation for sterile procedures, allowing
for easy one person application
of sterile transducer covers.
The Cyte ST also provides multiple basket options
for different user scenarios.
The power cord management system keeps the power cord off
the ground, keeping it from getting dirty or damaged.
One step height adjustment for a wide range
of users is also available on Theano side st.
And lastly, the low profile wheel base
and small footprint enable clinicians
to deliver care close to the bedside.
In these videos, you can see some of the highlights
of the streamlined design.
First, you'll notice the large 21 inch touchscreen,
which enables you to see the image clearly from
across the bedside.
When performing procedures,
the easy height adjustment you can see can be controlled
from the side of the machine, which allows you
to pull the machine close
to the bedside while still allowing for height adjustment.
Next, take a look at the storage basket options.
You can see in this video the standard basket options
and there are multiple options available.
In the second video. You can easily see
how solo sterile procedures can be performed using the easy
access transducer holders.
Next, let's cover the ano site. ST Workflow simplified.
The intuitive interface
with streamlined workflow includes optimized exam types
with most often used annotations and calculations.
Scan along capability with 150 onboard learning tutorials.
Auto steep needle profiling assists
with enhanced needle visualization,
which helps result in more precise procedures
and better patient outcomes.
A small footprint that allows for easy transport
between treatment rooms
and easy access to cleaning mode, which helps
to reduce room turnover time.
On the next slide, you can see a couple examples
of videos demonstrating some
of our workflow simplified features.
The first one is the one-touch cleaning mode
where you can see how you can easily access cleaning mode,
clean the system,
and then with a simple swipe, go back to live scanning.
Next you can see the optimized exam types
where you can quickly and easily choose the exam type
or procedure you're wanting to perform.
In the first video, you can see an example
of auto steep needle profiling
and see how easily that needle is visualized.
In the second video is a brief example of some
of the scan along tutorial videos you can use on the
Cyte st.
You can see when the video starts, you can move the video
around the touch screen
so you can easily access different controls while also
scanning to match the live video.
Does that make sense? So next,
let's talk about the image clarity seen on the Cyte st.
The Advanced Image Clarity helps you experience confidence
and precision with every procedure you perform.
The large image area provides easier visualization
to support accuracy of diagnosis and procedures.
The Cyte ST helps you identify anatomical targets
with confidence, helping support high quality patient care.
The image clarity delivers an illuminating view
of your procedure, supporting accuracy
and ultimately better patient outcomes.
So on this slide you can see on the left hand side is an
image taken with the CYTE S two.
On the right hand side is an image taken with the Cyte st.
As you can see in this image
of the inner scaling brachial plexus, the Cyte
ST doubles the image area from the Cyte S two
and provides higher pixel resolution resulting in
enhanced image clarity.
Now let's look at another comparison between the Cyte S two
and Cyte ST.
With the ESP images seen
above using a curva linear transducer,
our advanced speckle reduction algorithm reduces both
artifacts and noise.
As you can see, the Cyte ST
image on the right has outstanding tissue plane
differentiation, which allows you to easily distinguish
between both pleura and fasci planes,
essentially making safer and more effective blocks.
Now let's get to the live demonstration
of the all new sono site.
St. Daniel Shelton, director
of MSK market development is going
to assist me with the scanning.
And first we are going
to scan the median nerve at the level of the carpal tunnel.
- Thank you Jody, for that introduction.
Today we're gonna be scanning with the
L 1919 megahertz linear array transducer
and we're gonna be scanning right here about the crease
of the wrist and I'll start in a short axis.
And basically we're gonna scan
with the system settings just being
default straight outta the box.
And as you can see, we're at the the walkup screen
allowing you to choose what to do next.
So I'm just gonna hit the scan button since we're already on
the L 19 and right outta the box,
the settings are zoomed out a little bit
because this transducer can be a lot to kind of take in
as far as resolution.
If we're looking at something on the near field like
that median nerve at the top of the screen, I need
to bring my depth up more shallow.
So I'm just gonna use this little buttons on the side
and we're gonna bring the depth up more shallow.
And there we can see the median nerve quite
nicely in the middle of the screen.
So a normal median nerve one test you can do in carpal
tunnel, which is more of a dynamic study,
is have the patient make a fist and squeeze.
And as they curl their wrist,
that median nerve should stay situated fairly superficially.
So another way we can evaluate for carpal tunnel,
which is really nice to do, is look at an abnormal one.
I'm just gonna put my wrist up there. Thank you Jody.
And basically when you pinch,
you should not see the nerve dive down
between those flexor tendon heads.
So that can be a contributor of carpal tunnel syndrome.
So just something to look for out there.
Dynamic squeeze test of the carpal tunnel.
There's other ways to measure like the measurement methods,
but high resolution is very important along
with excellent frame rates to capture, popping,
clicking, anything like that.
So we're looking really closely at the vesicular detail.
You can see all the little fales inside the median nerve
and you can see the epi nearium is nice
and bright along with the surrounding tendon detail.
And as you can see, all of this detail that we're getting in
that median nerve is just straight out of the box.
These aren't my presets where I got ready
for this demonstration.
This is straight what you would expect
to see once you unpack the system and fire it up.
You might just have to change your depth so
that the machine auto focuses on the near field structures
instead of those deeper structures.
But this is straight outta the box image quality.
Alright, so that'll conclude the median nerve demo.
I'm gonna pass it off to Jody
and we're gonna scan inner scaling in the neck.
- Okay, thank you Daniel.
Thank you for that demonstration of imaging
of the median nerve using the new Cyte ST
and how excellent we can visualize that median nerve
and all the vesicles within the nerve.
And now let's take a look at the brachial plexus at the
level of the inner scaling groove.
So first thing I'm going to do is I'm going
to switch transducers.
Daniel was using the L 19 five transducer
and I'm now going to use the L 15 four transducer.
So what I'm going to do is I'm actually going to come here,
I'm going to select my transducer
and I'm going to choose the L 15 four on a nerve exam type.
And I'm gonna press scan
and now I'm ready to start scanning.
So what I'm going to do is put the transducer on the model's
neck and I will start scanning up.
And as you can see here in the center of the image,
and I'll pull up an arrow so you can see.
So here next to the arrow, you see
the inters scaling brachial plexus
with both scaling muscles next to it.
So here is one of the scaling muscles
and and the second scaling muscle.
And then up superior
is the sternal cla mastoid
and back down
to the brachial plexus here.
In between the scaling muscles,
I can scan fur further up the model's neck
or I can scan more inferior
and back to
the brachial plexus and I can easily move that arrow around
or I can take that arrow away, whichever I prefer.
Again, I have not touched one button on the system.
I have not changed the gain or the depth,
but certainly if I wanted to,
I could come over here to gain.
I could turn that gain way up.
I can bring the gain way down.
Or what I can do is I can press the auto gain key
and it takes me right back to the original gain settings,
which in this case work out perfectly.
If I wanted change the depth, I can come over here
and change the depth by pushing up
and down on the arrow keys.
And you can see how the depth changes
or what I can choose to do is I can change the depth,
dragging the cursor to the desired depth.
If I want to scan more medial,
I can see the model's carotid artery and jugular vein.
If I wanna turn on color,
I can certainly press the color key, turn that on,
or press the color key and go back to 2D imaging.
So with that, we will go to our live q and a session.
I look forward to your questions.
Please feel free
to enter your questions into the chat feature
and Chris will then call out what your questions are
and either Daniel
or myself will be happy to answer those questions.
- All right, thank you guys
for an excellent presentation on some of the cool features
of the Sono site St.
We'll go ahead and take some time
for questions from the q and a box.
Now it doesn't look like we currently have any in there,
so we'll wait just a little bit
for some questions to come in.
All right, well it doesn't look like we have any questions
from anybody, so thank you all for coming
and joining us here today.
For some more information on the Sonos site sd
and to contact us with questions, please go
to sonos site.com
and to see our other upcoming live webinars
and recordings of past webinars,
please visit our webinars page from the sono site
website@sonosite.com slash behind the scan webinar.
Thank you all for joining us again today,
and we'll see you next time.
Here you will learn about our latest innovation in ultrasound technology — Sonosite ST. This recent addition to our portfolio with its sleek all touchscreen and large image area helps enhance procedural efficiencies. Learn more in this webinar about how Sonosite ST helps provide easy visualization to support accuracy of diagnosis and procedures. Watch as we demonstrate how this is done.
What You'll Learn
In this webinar you will learn how to:
- Confidently use Sonosite ST and its intuitive user interface.
- Save time during procedures with fewer touches.
- See images more clearly with the sleek 21” all touchscreen and large image area.
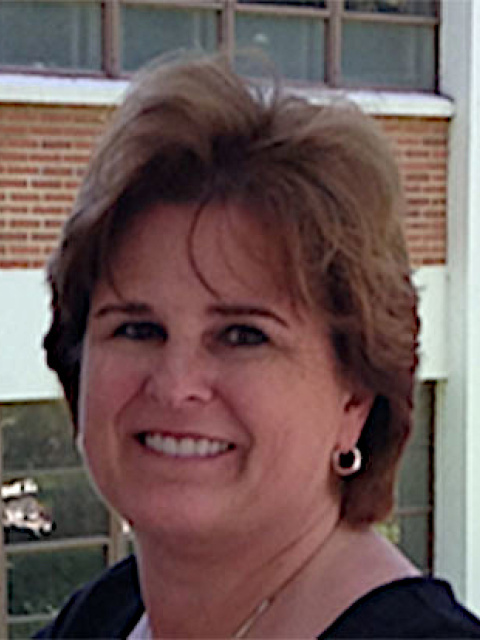
Jodi Miller is the Director of Market Development with 20 years of experience with FUJIFILM Sonosite. Jodi strives to understand new and trending POCUS use models. She has been a sonographer for more than 25 years and specializes in both vascular and general sonography.
This educational webinar is intended for healthcare professionals and not for patients or consumers. The material is provided for general educational purposes, as a reference and a supplement to professional experience, education and training, and should not be considered the exclusive source for this type of information. The presenter in this webinar is a paid consultant of FUJIFILM SonoSite, Inc., and is sharing the presenter's own views and opinions that do not necessarily represent the views and opinions of FUJIFILM SonoSite, Inc. This educational webinar is not intended to recommend any device for a particular indication or to provide indications for use for any device. At all times, it is the professional responsibility of the practitioner to exercise independent clinical judgment in each particular situation. Fujifilm assumes no responsibility or liability for any misuse of the information imparted in this webinar. This educational webinar does not supplement, replace, or supersede device labeling, including instructions for use, which accompanies any FUJIFILM Sonosite product.