


Transcript
- Welcome to the Fujifilm Sono site
behind the scan webinar series.
Today's session is gonna be optimized for regional
and perioperative anesthesiology.
My name is Joy Trotter.
I am the clinical applications manager
and I will be presenting alongside my colleague
Tice Warden, who is a senior clinical
application specialist in Southern California.
We're really excited to show you the new Sauna site
PX today.
And with that we are gonna start
with a brief video, Tice and I at the top.
So welcome. Thank you all for attending.
- Alright, thank you.
- Alright, Tana - Asano site PX was designed
with a clinician in mind.
The key areas we focused on during the development
of the PX was the adaptability to your workspace
to image clarity and three workflow efficiency.
I'd like you to note that the top two thirds
of the system is a touch screen while
what we're being shown here is a closer view
of those physical controls.
These physical controls are the most commonly used
for every exam type.
Each button is individually shaped
to encourage a tactile memory feedback so
that your eyes never leave the clinical monitor.
The next video here is going
to highlight the adaptability of the system.
Here you see the transition from a horizontal
to a vertical scan position with a simple motion
of your hand on that front bar.
This allows you to adjust the system
so you can scan comfortably in your
ever-changing work environment.
Moving down the system you can see exciting innovative
changes we've made.
First what you see in the center here is the
cable management.
With this new cable management, we ensure
that no matter the height of the system,
you will no longer be running over cords,
which will also keep them a lot cleaner
and off of your floor.
You'll also see that there's a dedicated white container
and gel holder.
And last but not least,
you're kind of getting a preview of it.
Here is our image clarity.
This brand new system is equipped
with proprietary speckle reduction technology,
improved color performance,
and a brand new family of transducers.
Here are our brand new family of digital transducers.
We have moved to a different nomenclature in how we
named our transducers.
I'm gonna start first though,
having you look at the system.
If you look at the system over to the left hand side,
you can definitely see the angle at which you can scan
in a more vertical position where the image
to the right is displaying a little bit more
of that horizontal.
Again, this just gives you a little bit
of a better representation with the still images
of the adaptability of the top piece
of our system, our system.
And then on the bottom,
if you look on the right side picture, you can see
that there is a bar here in front
that is gonna be your easy adjustable height of the system
by placing that bar down.
Now that bar is accessible from the right, left
and middle portion of the system to help you get as close
to the bed as possible.
We've also lowered the profile of the bottom of your system.
So back to the transducers.
We're looking here at the family of PX transducers.
We're gonna start out with our L 19 to five transfuser.
This exciting transducer is the highest frequency
that Cyte has offered with a one mil,
one centimeter, excuse me, one centimeter
minimum scan depth
and incredible clarity for your nerve,
your superficial nerve assessments as well as
peripheral vascular.
Moving to the right you'll see the L
15 four transducer.
If you're familiar with our legacy products, this is going
to be similar in footprint.
It's actually the exact same footprint as our HFL 50.
So this is a 50 millimeter footprint
but scanning from a 15 megahertz down to a four
and this will just allow you a little bit more surface area
to see the entire length of your needle.
And we'll move to the next one.
This brand new transducer for us is the L 12
to three transducer.
We're calling this kind of our workhorse probe.
So this is combining our legacy L 38 transducer
with the HFL 38 transducer.
So being a 38 millimeter footprint, we now have the ability
to scan at a depth
of a nine centimeters with this transducer.
Perfect. Here we're just gonna show you a few images.
- So this is our our newest transducer.
These are a few images that we've acquired out in the field.
Again, this new system, the px,
we just launched this in July,
so we've had really great feedback in anesthesia.
So with our 19 to five, these are very superficial images.
This first image on the inner scaling
at the most anterior depth there were about six millimeters
underneath the surface of this skin.
You can appreciate the brightness of the exterior part
of the nerve and the hypo coic center helping you
to easily identify your landmarks
for your inner scaling blocks there.
This next image, this is at our most minimum imaging depth.
So this is at one centimeter.
So this median nerve is really about two millimeters
underneath the surface.
And if you really look at those les, you can count them,
you can easily identify that nerve bundle
for those blocks.
Excellent image quality there again, this is using
that linear 19 frequency
and this is a supraclavicular.
So a little bit deeper block.
We can see the fales really nicely
and also have awesome clarity here within our vessels.
Maintaining that hypo coic appearance.
The next transducer
that's really been a very popular workhorse transducer
out in anesthesia.
These were taken out in the field.
This is our 15 to four,
so a little bit wider footprint here.
This transducer tends to be a little bit more popular
for those folks that wanna see the whole
shaft of the needle.
So for those surface areas that are larger
and not as tight to get into.
So this is actually the same inner scaling,
so comparing apples to apples, anatomically speaking,
just the different transducer.
Again, our maximum depth here is about two centimeters.
So very superficial, excellent resolution on that image.
Now this next image has
our steep needle profiling on.
If you are not familiar with this,
we're gonna demonstrate it live in a phantom.
But for those of you who've used our other products,
we've called it multi-beam enhancement
or steep needle profiling.
And what that's allowing us
to do is see this needle coming in at steep angles without
losing the image resolution.
So when you stop and take a look at this image, you see this
this yellow triangle on
and that's indicating
that you've deployed this deep needle profiling
and you have your nerve bundle here.
The great thing about this technology is we're not losing
frame rate, we're not losing resolution
and we're not requiring a special needle.
This is a regular non echogenic needle.
So we don't need any calibration.
We simply turn it on
and we will see this needle enhanced as well
as keep our resolution in the artery and the nerve here.
And then our next one, so this is a nice image post bolus.
We can still see that nerve really nicely as well
as seeing the whole shaft of
that needle if you do in fact have your area
of interest located off to the side as this block does.
All right, I'm gonna go ahead and turn this over to Tanis.
We're gonna do some live scanning
and if you do you, I failed to mention,
sorry you all are muted.
If you do have any questions during this presentation,
you can type them in the q and a
and we are gonna pause at the end to go over any q and a.
- Perfect. So what you should be seeing now is a display
of the control panel of the ps.
The top two thirds here is dedicated
to the touch screen
while the bottom third down here is gonna be dedicated
to those tactile keys we touched on in the video.
For purposes right now I'm gonna focus just on
the touch screen.
So we're gonna zoom that in.
Perfect. So this screen might look familiar to some of you
that are familiar with our export product.
This greeting screen will come up when you
open up the system.
So we can jump right into scanning here.
We would have the ability also to enter patient information.
We can select one of three transducers
that are continuously plugged in
or you have access to learning modules
and we can come back to those in a minute.
I'm going to start by pressing scan.
This is gonna be the screen that you're greeted with
when you start your scanning.
Now note that we didn't lose the functionality
to say enter patient information that's here
highlighted nicely green.
And then we also have the ability here to go back
and select a different transducer.
I'm gonna select my transducer here.
I have plugged in the P five one.
This is a really nice transducer for
that perioperative spot.
This is where we can do things like a focused cardiac exam.
We also have a tab here
for a comprehensive cardiac exam type.
With advanced calculation you can do lung
and then as well as abdominal content.
So the P five one is a nice versatile transducer
that can be used in the perioperative space.
Next we have that 15 four plugged in.
Note that each transducer has an array of exam types
that are specifically optimized for that transducer.
And lastly we have the 19th to five.
I'm gonna select this one.
You can see that it's already selected.
It has a nice blue outline on the outside
of it letting me know that that's the active probe.
And then as well it's telling me
that when I launch I would be on a nerve exam type.
I have the ability to either double click that nerve
or I can highlight the nerve and press the word scan
and it'll now launch my transducer for me.
In the center here we have this is, this really speaks
to the adaptability portion of the system.
So this screen here in the center will look different if I
was on say a cardiac exam type.
These particular features are going to be
exam specific
and they'll be the most commonly used features
for the exam type that you are in.
You can see here that these are commonly used ones
for the nerve
and anesthesiology as I move over.
We're gonna talk here really quick about this learn module.
So the learning modules are over 150
learning modules onboard on the system.
Each of these are a specific to the type
of department that you're in.
So anesthesiology for example.
And each video is a two minute video
to show you and give you guidance on how
to perform a particular exam type.
So I'm gonna, is used
to perform an ultrasound guided axi regional nerve block.
I can adjust the volume here,
I can also mute it here.
It's gonna show me that nice image of where of how
to place my transducer, exactly how
to display my patient for the best imaging
and then it will show me this pornographic appearance of
what it is I'm looking for.
I have the ability at any point to pause this video,
I can rewind this video or fast forward by 15 seconds
and I really love that you get that nice little green
outline when they're showing you something specific.
And you also have the ability to scan along this video with
with all your imaging parameters in the background while you
are scanning a patient it outta this.
Now we know that the system can be used for
an array of different exam types
and also a lot of different
comfortability factors with ultrasound as far
as your staff members.
So one of my favorite features
of this system here is this help.
Now if I go into my help menu,
I do have things like a quick guide that would take me
through some of the most commonly used features.
I do have a full user guide
as well associated with the system.
But my absolute favorite part, I'm gonna exit out of this,
my absolute favorite part is that each individual button
has a little eye up here in the right hand corner
and that's to give you a real quick brief description
of each individual feature.
So I am gonna press procedure mode for example,
and this is telling me that I can disable the sleep mode,
automatic power off
and notifications,
preventing the system from interrupting a procedure.
So it just helps me know that
that's the button I would wanna turn on if I knew I had an
extra long procedure
and I didn't want the system to intermittently go to sleep.
Maybe in that 32nd time period
or I'm sorry, 30 minute time period
that you might normally have it on.
I'm gonna move down here now
to my physical controls down at the bottom
how many physical controls you can see,
things like again the unique shape of each button
to encourage that tactile function.
I'm gonna increase my game here
and I don't know if you can hear that,
but there is also an audible feedback as well as tactile
to let you know that you've made contact with
that button and are using it.
Your depth is here Next.
So again, these are commonly used controls
for every exam type.
We'll move over here next to things like your freeze.
This is a single image acquisition.
So this little picture, I'm going to press
that you hear a nice beep.
Now you're seeing a display of the thumbnails of thumbnails
of the images that you have taken.
This is a nice visual cue to let you know what type
of images you've stored.
You also get other visual cues back up on our touch screen
here, like I didn't put in a patient name.
So this button was green when we started.
Now we have a cautionary sign here letting us know
that there is no name
or MRN number associated with this study.
And then last of course,
but not least this end study you have it nice and orange.
So it's really a good visual cue to know
that maybe you come upon a system
where somebody didn't previously end their the nice
beautiful orange color to signify you that maybe you need
to end the previous in person's exam to start a new one.
We'll keep coming back down here on these tactile keys.
Not only can you save an A single image,
but we can also save a small video clip of information.
And then here we're looking at our modes.
So color M mode and doppler.
So to show you the adaptability of
that middle touch screen we talked about,
I'm gonna launch my color now.
You can see that all
of the parameters here in the center are gonna be associated
with my ways to manipulate my color.
Again, just a nice really easy way
to have this system geared toward making this workflow
really simple and easy for you.
If I wanted to quickly remove any modes, I can press tubey
and all of the things like my color and mode
and doppler would be removed.
Okay, now that we've kind of gone
through the system a little bit, I am going
to pick up my L 19 five transducer
and we are going to start scanning.
So I'm going to decrease my depth here
and show you my median nerve.
Look at the detail in this median nerve you have
beautiful fales
with a nice skin line intact.
You can see all the muscle.
And I'm just gonna scan this up just a little bit
because I wanna show you that not only can I see
so much information about my median nerve,
but if I slide over a little bit, I'm also able to see
and appreciate my radial artery and those two veins.
Please note that the only manipulation I've made
of this system is the depth.
So that nice clunk ability factor
of my transducer makes this, again,
that image clarity we've been looking for in a,
in a new system, especially this 19 to five transducer.
And I'm going to decrease my depth to one centimeter.
Again, just to show you that with
that one millimeter stand depth will look like.
I'm gonna move to my median cubital nerve here
and take a look at that image clarity.
You see so much detail here on that superficial nerve.
I mean, I'm sorry, superficial vein.
- So this vessel
that Tana is scanning is about two millimeters
underneath the surface of the skin
and I think you can appreciate the blood flow moving
through there without even having to apply color.
That's really due to the fact
that this is a 19 megahertz transducer
and you can also see her valves really nicely,
which can help you with your IV success rate
and avoiding IV insertion at that valve level.
This is, this is amazing clarity.
I've been doing ultrasound for 25 years.
I've never seen anything like this.
We're, we're really excited to offer this transducer
that muscle, the muscle tissue underneath.
It's gorgeous.
- Perfect. Next I'm gonna move
to my neck to show you some of our new features
and color imaging.
Joy. I'm actually gonna have you speak to this.
- Okay, so here we are.
Tice is in the center of her neck
and you'll see as she hit color,
a menu popped up down on the right.
That said it prompted you if you want
to change the color box, you're gonna use the track pad
or if you need to change the size,
you're gonna use the track pad as well.
So this is gonna optimize your color box size for the vessel
that you're looking at.
And we have a new feature that we're really excited to show.
It's called Color Compare.
You have that option as soon as you enter into color.
So what you're gonna notice is if you have a very vascular
structure and you want to see your needle trajectory
with color on
and with color off
to verify if you're at a safe path away from blood vessels,
you have this amazing frame rate of real time color
and real time gray scale side by side.
It gives you a vast amount of information very quickly
that will help make your procedure safer,
give you more confidence,
and to exit out you simply hit 2D
and that takes you back into your scanning mode.
So is our, our scanner and our model. So this is her next.
So I'm gonna try and annotate a little bit
for her while she's doing this.
You can see the manipulations that Tni is making.
She's applying the time gain compensation.
You can see that is giving you a precision pinpoint
right down here.
So you can optimize your image in the near field
or far field as well as adjust your near gain and far gain.
So you can, you can use it with your finger.
Actually let me switch over to show you that adjustment.
You can use the finger thanks Tanis,
or you can optimize it
with the wheel if you like the tactile feel as well.
- Don't forget auto game.
- Yep. And so for those folks that wanna keep it simple,
these presets are very much designed for plunk ability.
So when you put the transducer down on your correct preset,
other than adjusting your depth, you should be good to go.
But for those that like to fine tune the image,
that's why we've added some more advanced adjustments there.
- Perfect. Next, what we'd like
to show you is our steep needle profiling technology.
So we call this our adaptable
steep needle profiling technology.
Again, some of you familiar with our legacy product
might be familiar, however it it's the next generation.
So now instead of having to choose this shallow,
medium or steep approach,
this system is automatically going to adjust for you.
So I'm going to do this on a phantom just to show you.
I'm gonna, I know
that you have a a little bit of a picture and picture here.
So this image is gonna be small,
but this is where we're activating our needle profiling.
And the approach I'm gonna take is coming from
those two solid lines in your image,
directing my needle toward the dotted line.
And we're gonna see this needle come in here in just a
second and look at that.
Just amazing.
Now, if I were to change the tra, the trajectory
of my needle and come in very steep,
I can still see my needle.
Or if I wanted to, I could also
take a more shallow approach.
And that needle is still just beautifully visualized here.
So the system is adapting to exactly
where I'm placing my needle.
Now, what this would look like if we took it off,
we'd still be able to see the needle just not quite
as well here.
So I always like to say it highlights your needle like a
Christmas tree, the perfect time of year to use
that analogy, analogy.
I can also, if I was coming in from the other side
of the transfuser, I can change which way the technology
presents itself without having to actually change
my orientation.
- Beautiful. Look at that detail
and
I'll take that off.
Great,
- That was excellent, Tanis, thank you.
Thank you so much for attending today.
Each participant will receive a recording
and a link if you would like
to take a deeper dive into the system
with a follow-up in-person demo
to get your hands on the system
and see how it really performs
and how easy we can achieve that image clarity.
Or if you would like to set up a virtual demo personalized
for your department, we can do that as well.
And I'm also going to turn over to the q and a
and see if we have any questions.
- Let me just check that
- QA, if you have any questions
based on what you have seen today, please feel free
to fill them out
and we can take a few minutes here to answer any questions.
I don't have any currently,
but we can stay on for a few minutes longer
to answer anything or you can reach out to us directly.
Well thank you guys very much for your time.
And oh, we just got a question.
Can you tell me INE board is same as Saana site Export
or Edge two?
That question that was just typed in
the PX is built on a separate platform,
but that's a little bit more specific of a question.
And I will reach out to you as far as the board,
but the PX was built from the ground up
and it's, it's a separate platform.
All right, thank you all very much
and have an excellent rest of your day
and we look forward to seeing you in person soon.
Thank you very much.
Join us for an anesthesia-focused demonstration of the all-new Sonosite PX point-of-care ultrasound solution. Sonosite experts review the system with you, and discuss the unique advantages of utilizing POCUS for regional and perioperative procedures, such as complex nerve blocks, and monitoring post-surgery.
What You'll Learn
- How our most-advanced image clarity helps you to better visualize sonographic landmarks
- Key Sonosite PX features, such as the adaptable work surface, and how they support your practice
- We’ll take a closer look at the new family of advanced digital transducers, including the L19-5, the highest frequency transducer Sonosite has ever produced
- How Auto Steep Needle Profiling helps you to clearly visualize the needle during complex block procedures
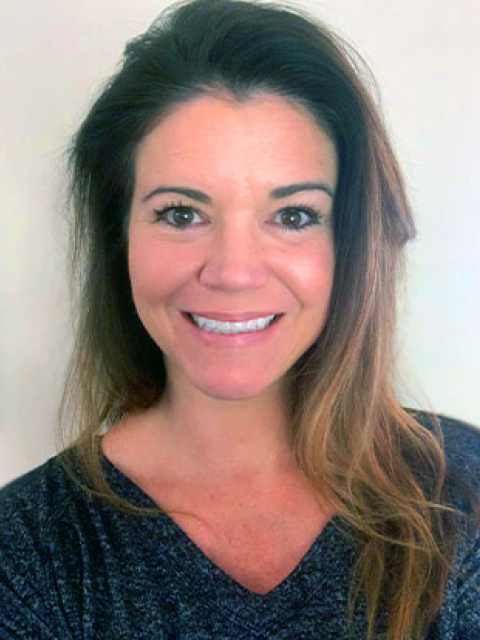
Tanis Worden is a registered OB/GYN and breast sonographer. She is a 15-year-veteran clinical applications specialist based in Southern California, where she supports Sonosite customers with point-of-care ultrasound needs.
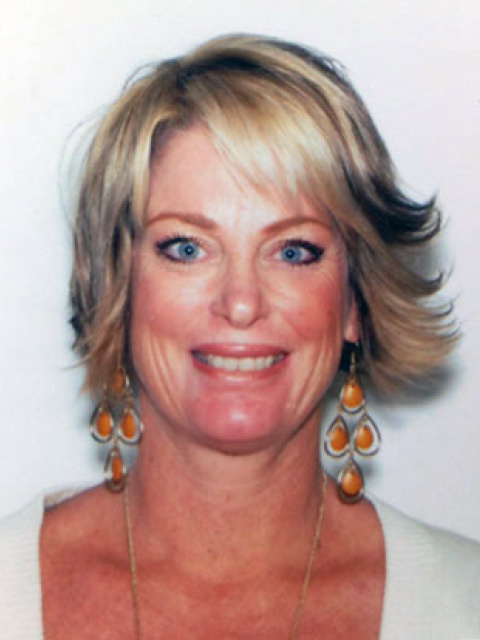
Joy Trotter has been with Fujifilm Sonosite for 11 years and leads our Western clinical applications team. She has practiced ultrasound for 28 years, and is a registered abdomen, OB/GYN, and vascular sonographer.
This educational webinar is intended for healthcare professionals and not for patients or consumers. The material is provided for general educational purposes, as a reference and a supplement to professional experience, education and training, and should not be considered the exclusive source for this type of information. The presenter in this webinar is a paid consultant of FUJIFILM SonoSite, Inc., and is sharing the presenter's own views and opinions that do not necessarily represent the views and opinions of FUJIFILM SonoSite, Inc. This educational webinar is not intended to recommend any device for a particular indication or to provide indications for use for any device. At all times, it is the professional responsibility of the practitioner to exercise independent clinical judgment in each particular situation. Fujifilm assumes no responsibility or liability for any misuse of the information imparted in this webinar. This educational webinar does not supplement, replace, or supersede device labeling, including instructions for use, which accompanies any FUJIFILM Sonosite product.